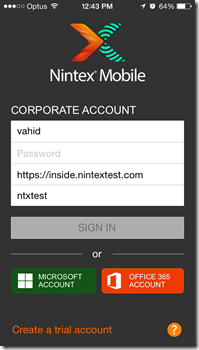
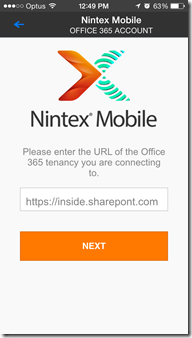
Browsing the web, today I came across the news that Drobbox is also ditching code sharing and moving to Native Development for their mobile apps. Looking at the recent trends of big companies, like Airbnb, move towards native mobile development, this was not a surprise at all. However, it made me have a flashback about our mobile development journey for Nintex Mobile.
Back in late 2011/early 2012 when we started looking into which technology to use for Nintex Mobile, we POCed Native development, PhoneGap, C++ and Xamarin. However, the most important question we wanted to answer was not which technology was cheaper/quicker to develop on, but
WHICH TECHNOLOGY WORKS THE BEST FOR OUR USERS.
Don’t get me wrong, we were not Google or Facebook with unlimited resources and cost of development was definitely a factor for us to consider but not the most important one. With that priority in mind, PhoneGap and Xamarin were quickly crossed out. PhoneGap did not hit the bar from the experience point of view. Xamarin was fairly new back then and the effort we had to put in for getting what we wanted was significant, we hit various limitations (same as PhoneGap), and the end result was not hitting the bar either (although it was better than PhoneGap). It took us a while but we could finally get C++ working and result was good. However, there were way too many hacks and not standard approaches (for bridging, etc.) that made it a big risk. We knew, being an enterprise app, we needed to push each mobile platform to it’s limits for all sort of features, like network stack to support various authentication, etc., and not standard approaches is going to be fragile and time consuming. On top of that finding non standard resources on stackoverflow was going to be an issue. (yes, that’s the truth that everyone consults with stackoverflow and google for their software development questions :0 )
Well that left us with native development for iOS (Objective-C), Android (Java) and Windows (C#). (yes, we did Windows as well  ). We formed a team to implement Nintex Mobile app, with one caveat, none of them had experience in mobile development. They were Enterprise App Developers with a great knowledge around Enterprise Software Development and Design Patterns. (I still dont know if that was a good or a bad decision
  )
)
The team had the first version of the app for iOS and Windows ready for release in 4 months or so which was a great achievement. With no experience in mobile app development, we tried to follow the best practices which were available at the time to setup the code, build pipelines, etc. but they all seemed so immature compared to the enterprise apps. Soon after the first release, we started doing Android. Developers being developers, i.e. efficient, they realized that there should be a more efficient way of delivering the same solution on three different platforms without compromising on user experience and functionalities. That’s when their experience came to help. So, We started asking the question, what’s the most time consuming part of delivering each feature. The answer came to be “defining a solution”. i.e. when to make a call, when not to, when to cache the result, when to prompt for authentication, what to do when the network call returns 404 or when user enters x instead of y. Then we realized that irrespective of the platform, these are shared logics and scripting them in different languages is not the hard bit. Next step was to see how we can logically share the “solution” for a feature across various platforms and implement it in different languages.
First step was to do a bit of refactoring (ok more than a bit  ) to align the architecture of the application on iOS, Android and Windows. Back then we adapted MVVM and managed to implement the same architecture on all three. The layers structure was the same and they shared same name as well. Basically all the none UI classes and their interfaces had the same name. For example, if you had a tasksRepository class with getTasks method on iOS, you’d find a class and method with the same name in Android and Windows in the same logical location. The logic within each of the “business logic layer” classes were also almost identical but written in one of the three languages. All the platform specific technologies were wrapped in xyzHelper classes. For example we had networkHelper class which was in charge of making network call, fileHelpClass which was responsible for interacting with files, etc. These classes did not share any code/logic as their sole responsibility was to abstract platform specific implementation of network, file, sharing, capabilities enable the rest of the app to utilized them through a common interface. For example, the an instance of the networkHelper class gets injected into the taskRepository class, which would use the httpGet method of the the networkHelper interface to make a http call and get a lis of tasks. etc.
Basically instead of sharing code, we share the logical solution and we created the architecture to enable that sharing in an efficient manner. Once the solution is defined and implemented on a platform, it’s just a code translation (objective-c to Java, etc.) to implement it on another platform. Also overtime we realized that if one person does the same feature across all platforms, we get a a lot more efficient and consistent result.
After a while we were so consistent that if a logic related bug was raised in say iOS we for sure knew the the same bug would exists in other platforms. Again, once in a while we used to get platform specific bugs, like a strange behaviour for NTLM authentication on iOS etc, which had to be fixed in the one of the xyzHelper classes.
This approached has helped us be a lot more efficient and consistent while delivering native experience to our users. It has also help up pretty well. 8 years later the approach and the codebase is still the same and it’s given us so much flexibility that we have been able to use the same code engine to create Nintex App Studio.
And before I forget, I am not talking about a team of 30, 40 or 50 mobile developers. The team behind this was a team of only 8 people. One hands on manager, 4 developers and 2 testers.
Now, I am sure cross platform technologies like Xamarin, React native, flutter, etc. have come a long way since then and They are for use better choice for some projects. (even back then PhoneGap and others would be a better option for some other projects). However, the take away form our experience would be that start by asking which technology is going to serve your customers better and choose that one. It goes without saying that you need to apply common sense to this by considering your scenario, skillsets, funding, etc.. For example, if you are a start up with very limited fund, you may not be able to afford doing native development in the first go and may just want to start with something quicker/cheaper and then quickly move to native, once the idea is proven and you have more fund to invest.
The native technologies have served us pretty well and looking back I am very happy with the decision the team made back then.
